Post layouts
Starting structures offered when you create a post: an article, release notes, a customer story, and a how-to guide.
A shared inbox works when anyone can tell, at a glance, which requests are theirs. This is the setup we walk new teams through in their first week, and the habits that keep it tidy after that.
In this article
Give every request one owner
When a request belongs to everyone, it belongs to no one. The first rule we set is that every open request has exactly one owner, even when three people end up working on it.
Owners change hands all the time, and that is fine. What matters is that the name on the request belongs to the person who sends the next reply.
- Flag requests that sit without an owner for more than an hour
- Hand a request over with an internal note, not a chat message
- Close a request only when the customer has what they asked for
Use tags for topics and views for people
Tags describe what a request is about: billing, bookings, a bug. Views describe who should see it. Mixing the two up is the most common reason a queue turns messy by the third month.
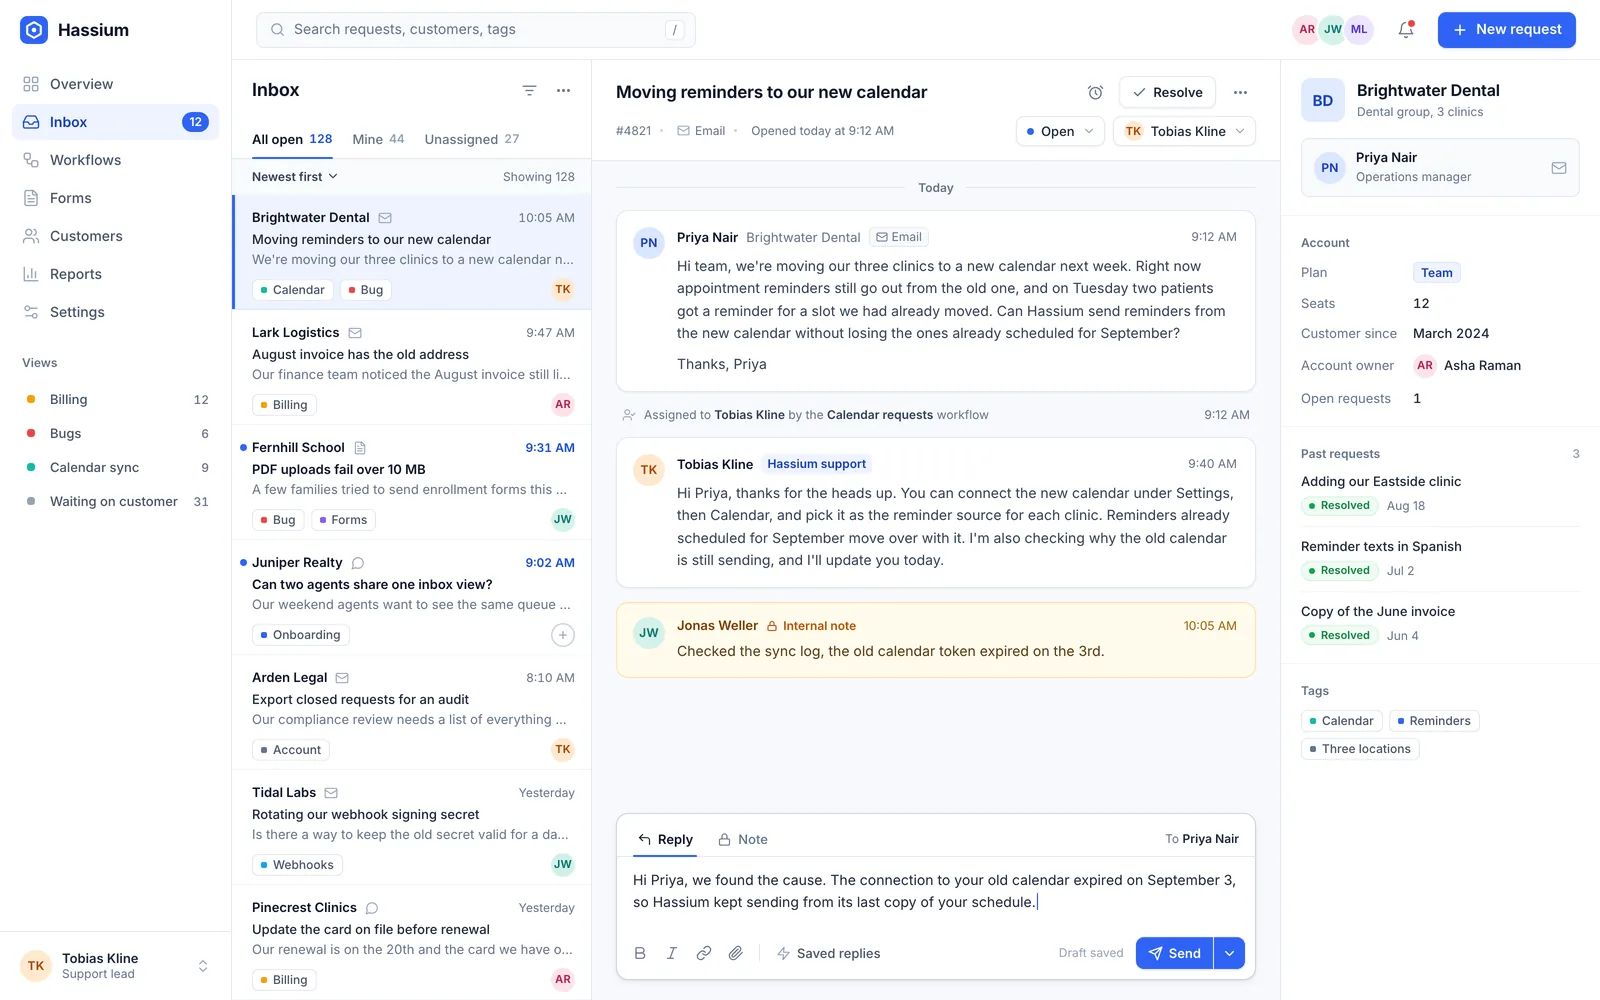
Start with five or six tags and one view per team. Add more only when someone asks for a list that does not exist yet.
Write saved replies that sound like you
Customers can tell when they are reading a template. Write each saved reply the way you would answer one person, then leave room for a line only a teammate could add.
We rewrite a saved reply whenever a customer answers it with a follow-up question. That question is the part the reply missed.
Tobias Kline, support lead at Hassium
Try this: Review your saved replies once a quarter. Old prices, retired features, and broken links hide in them longer than anywhere else.
Try this setup on your own queue
Every feature is free for 14 days. Bring a week of real requests and see how the inbox feels with owners and views in place.
Workflows 2.0
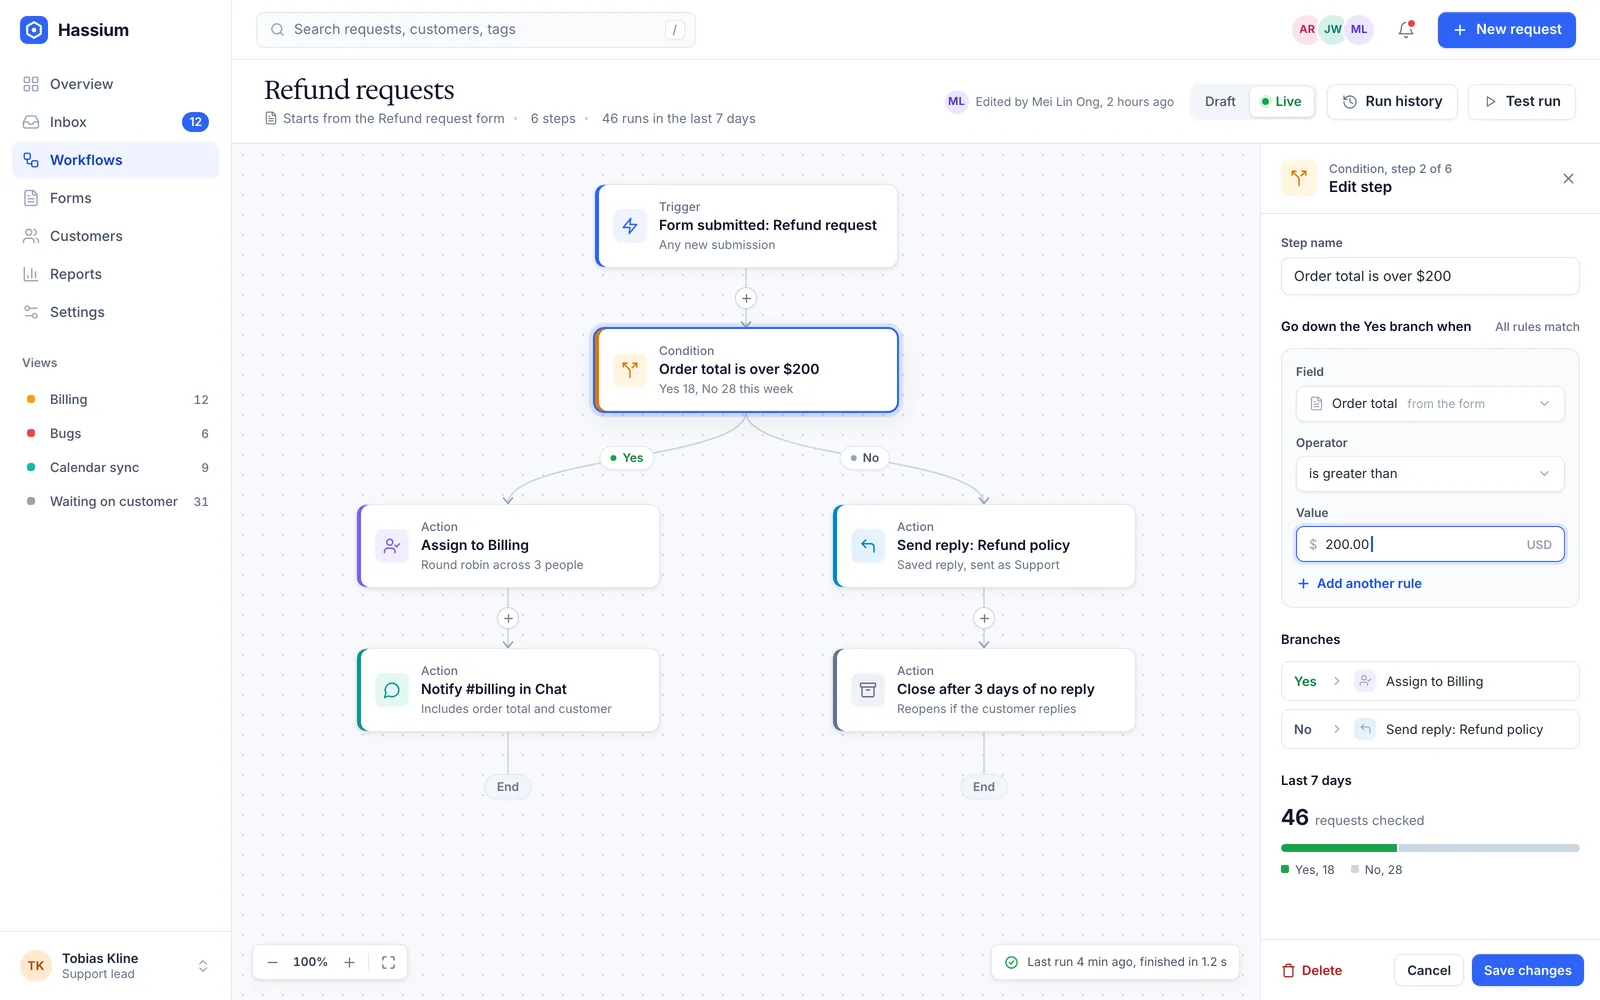
Workflows can now take different paths, pause for a customer, and show you their work on old requests before anyone depends on them. Here is everything in the release.
What is new
- Branches. Split a workflow on a tag, a form answer, or the customer's plan, and give each path its own actions.
- Delays. Pause a step for a set time, or until the customer writes back, then carry on from the same place.
- Test runs. Choose a date range and see what a draft would have done to every request in it, while the draft is still private.
Improvements
- The step log now says why each condition passed or failed.
- Large workflows open about twice as fast in the builder.
- Duplicating a workflow now copies its test history too.
Workflow runs in the REST API now include the branch each run took and the steps it ran, in order. Existing fields are unchanged.
GET /v1/runs/run_8f2c

{
  "id": "run_8f2c",
  "status": "completed",
  "branch": "over_limit",
  "steps": [
    "check_total",
    "ask_approval",
    "notify_owner"
  ]
}
Fixes
- Approval requests sent by email now expire after seven days, as the setting says.
- A form submitted twice within a second no longer starts the same workflow twice.
- Renaming a tag now updates every workflow condition that uses it.
Upgrade notes
For workspace admins
Existing workflows keep running exactly as they did. Branches and delays appear the next time you open a workflow in the builder, and nothing changes until you publish a new version.
For API users
branch is a new field on every run. It is empty for runs that started before September 8, 2026, so allow an empty value if your code checks responses strictly.
Brightwater Dental books patients across nine clinics from one front desk team. Here is how they stopped losing appointment changes between the phone, the inbox, and the website.
| Company | Brightwater Dental |
|---|---|
| Team size | 12 people across nine clinics |
| Plan | Team, billed yearly |
| Using Hassium since | March 2025 |
The challenge
Patients asked to move appointments by phone, by email, and through a form on the website, and each clinic kept its own list of changes.
Changes slipped between those lists. A patient would email on Friday, call on Monday, and arrive on Wednesday for a slot that had already moved. Priya Nair, the operations manager, counted 14 missed changes in one quarter.
What they changed
The team moved all three channels into one Hassium inbox in a week. An intake form replaced the free text box on the website, so every request now arrives with the clinic, the patient, and two preferred times.
- A workflow routes each request to the clinic it names
- Anything without a reply after two hours goes to the shift lead
- Saved replies confirm the new time and link to the clinic's map
The results
Six months later, the same front desk team handles about a third more requests, and missed changes are close to zero.
38 min
1
94%
Nobody keeps a list on a sticky note anymore. If a patient asked for something, it is in Hassium, and it has a name next to it.
Priya Nair, operations manager, Brightwater Dental
Brightwater is now setting up the same routing for insurance questions, starting with the two busiest clinics.
This guide connects Hassium to your own server with a webhook, so every new request is posted to an address you control. From there you can log it, alert on it, or copy it into another system. Plan on about fifteen minutes.
What you need
- An admin role in your Hassium workspace
- An HTTPS endpoint that accepts POST requests
- A safe place for a secret, such as an environment variable
Set up the webhook
- Open the webhook settings Go to Settings, then Integrations, and choose Add webhook.
- Paste your endpoint Enter the HTTPS address that should receive requests. Plain HTTP addresses are rejected.
- Pick the events Start with Request created. You can add replies and status changes later.
- Copy the signing secret Hassium shows it once. Store it with your other credentials, never in your code.
- Send a test event Choose Send test and check that your endpoint answers with a 200 status.
Check the signature
Every delivery carries a signature header. Compute your own from the raw body and your secret, and trust the request only when the two match. A minimal check looks like this:
const expected = hmacSha256(secret, rawBody);
const received = request.headers['hassium-signature'];

if (!timingSafeEqual(expected, received)) {
  return respond(401);
}

return respond(200);
Troubleshooting
The test event times out
Hassium waits 10 seconds for an answer. Reply with a 200 status straight away and do the slow work afterward, in a queue or a background job.
The signatures never match
Compute the signature from the raw body, before anything parses it. Parsing and re-encoding the JSON changes the bytes, and the signature changes with them.
Every request arrives twice
Hassium retries a delivery when it gets no 200 status in time. Store the delivery ID from the header and skip any ID you have already handled.
Next steps
Once test events arrive, you can narrow down what gets sent or add more events: